> For the complete documentation index, see [llms.txt](https://docs.acecloud.ai/knowledge-base/llms.txt). Markdown versions of documentation pages are available by appending `.md` to page URLs; this page is available as [Markdown](https://docs.acecloud.ai/knowledge-base/network/how-to-add-a-subnet-to-a-existing-private-network.md).
# How to add a subnet to a existing Private network?
Follow the steps below to know how to add a subnet to an existing private network:
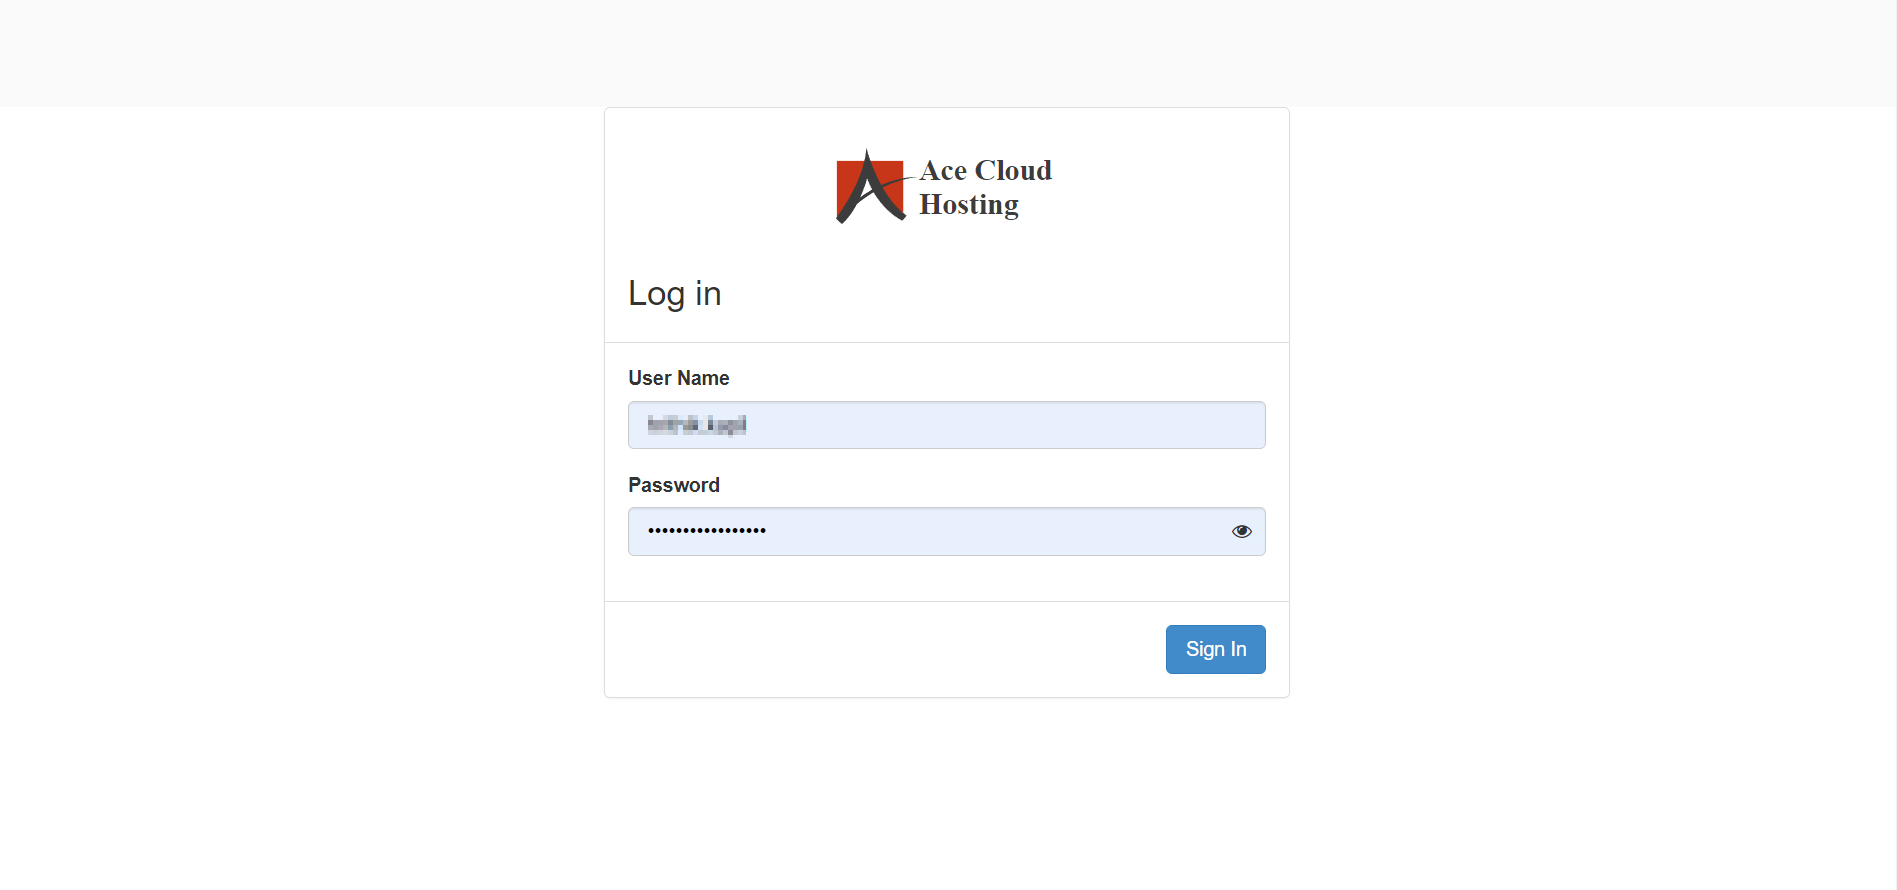
**Step 1:** [Login](https://console.openstack.acecloudhosting.com/auth/login/) with your username and password.
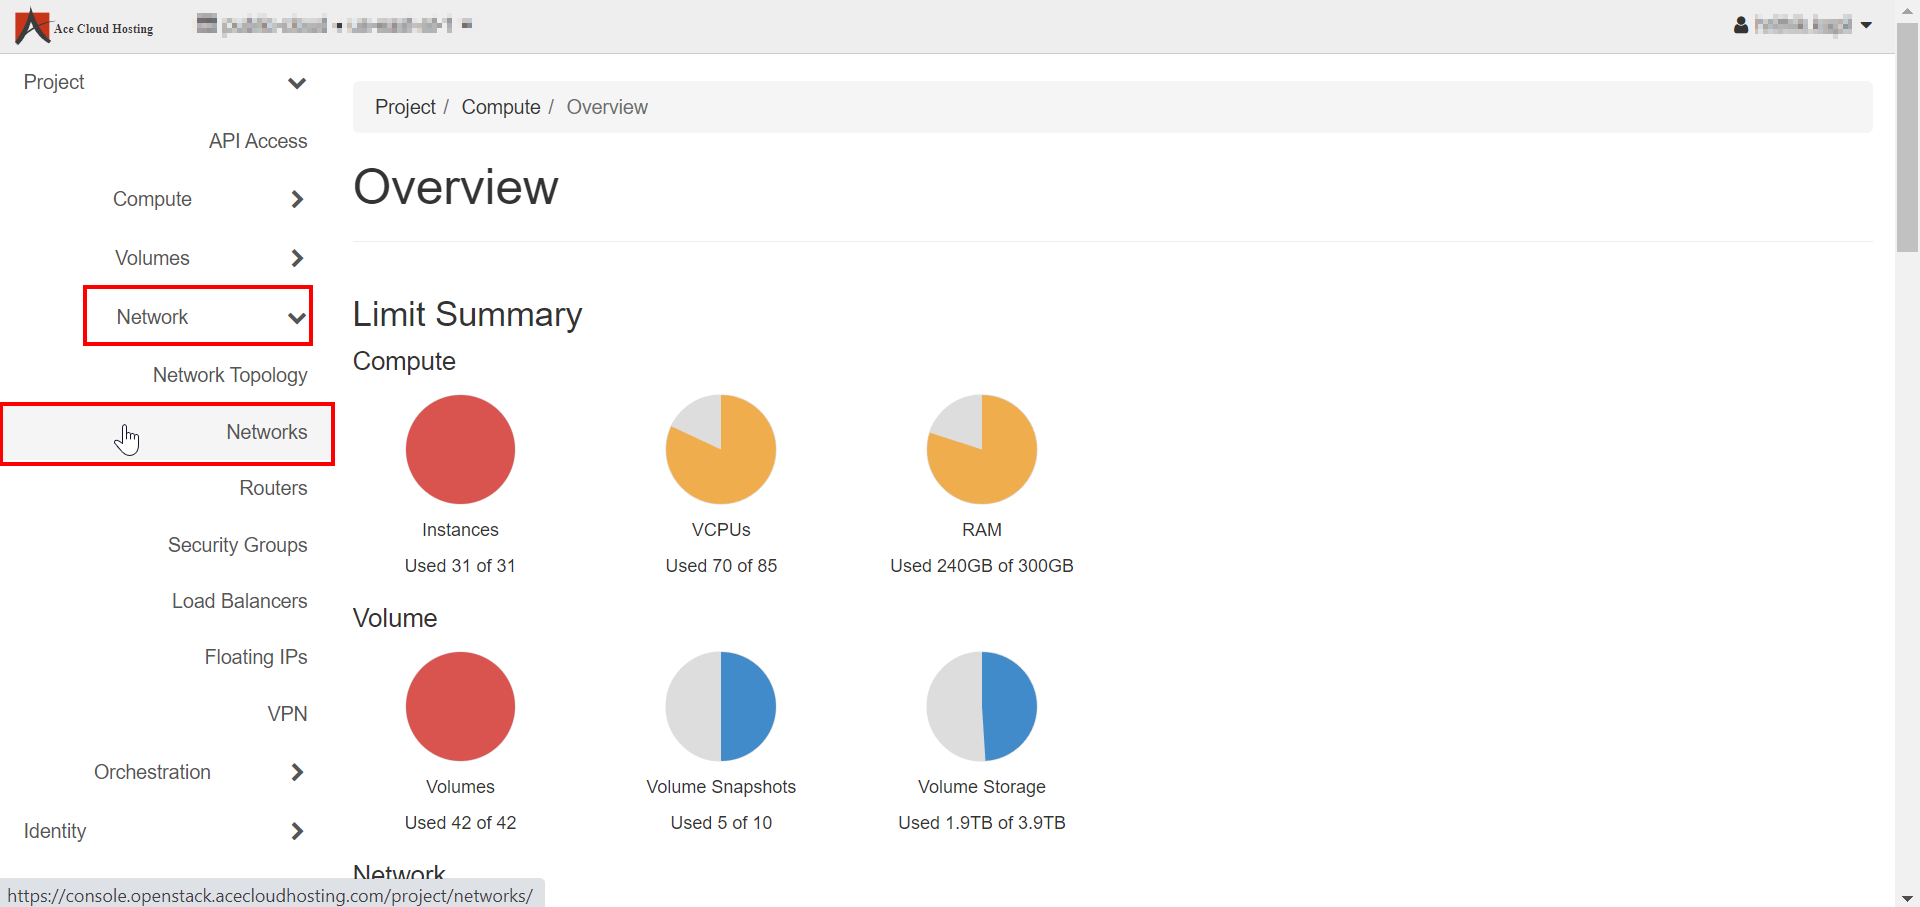
**Step 2:** From the left navigation, select **Network** and then select **Networks**.
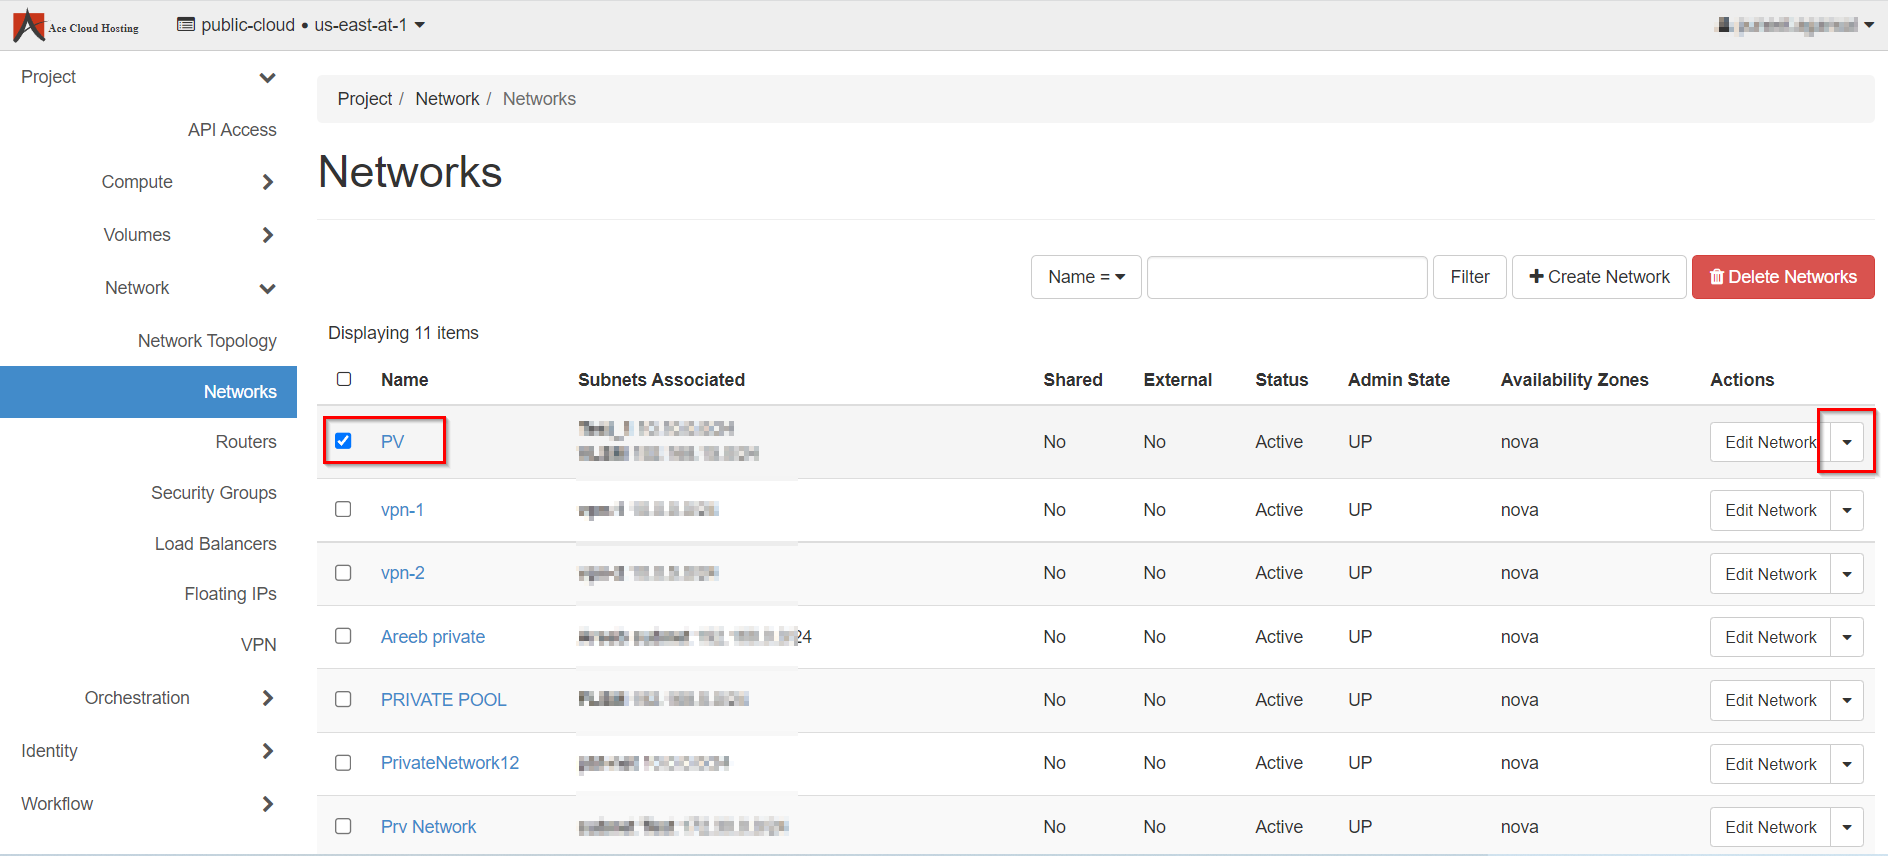
**Step 3**: Choose your network and click on the **drop-down**.
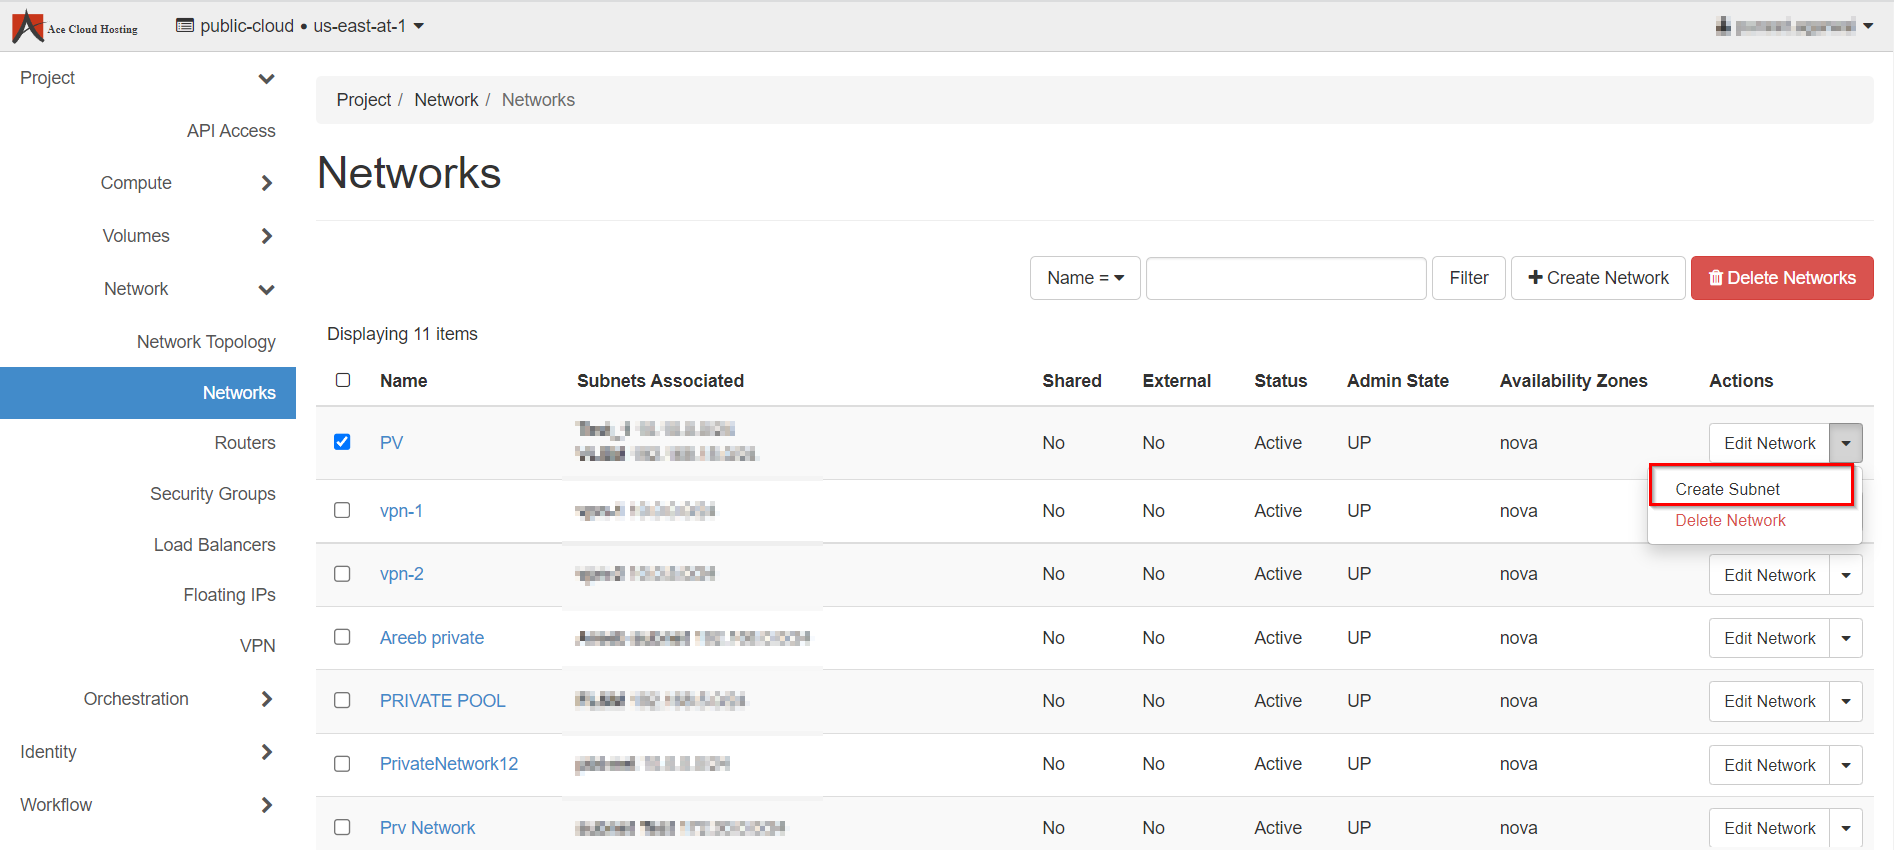
**Step 4**: Click on **Create Subnet**.
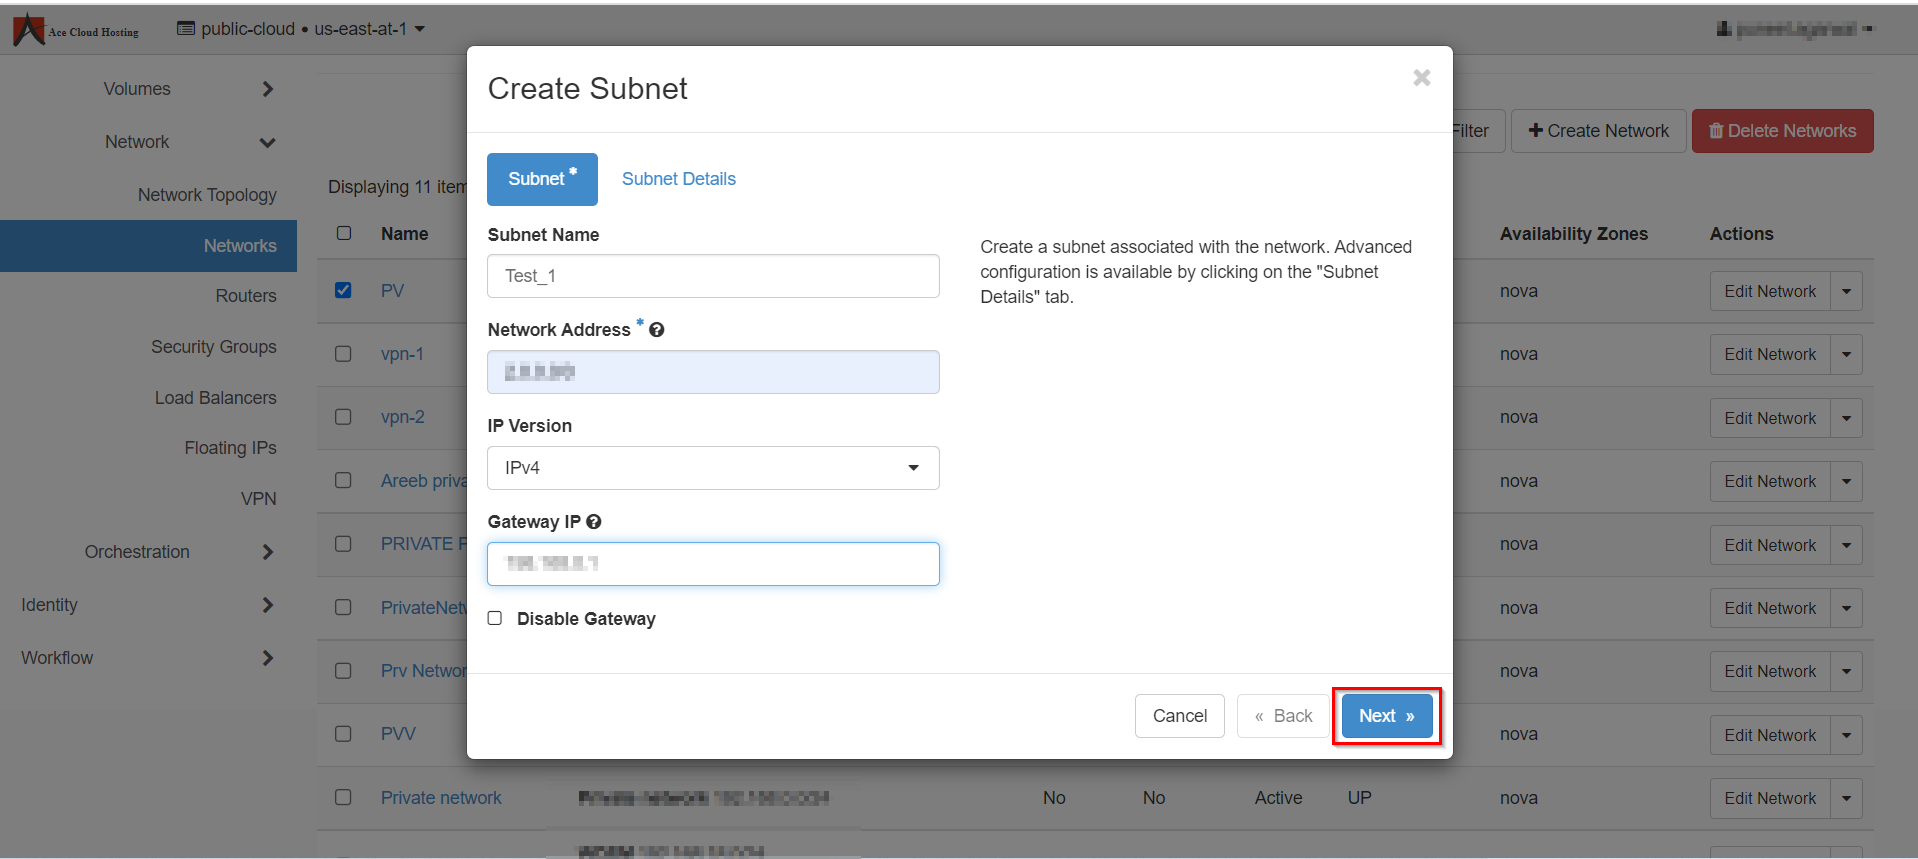
**Step 5**: Fill in all the details and click on **Next**.
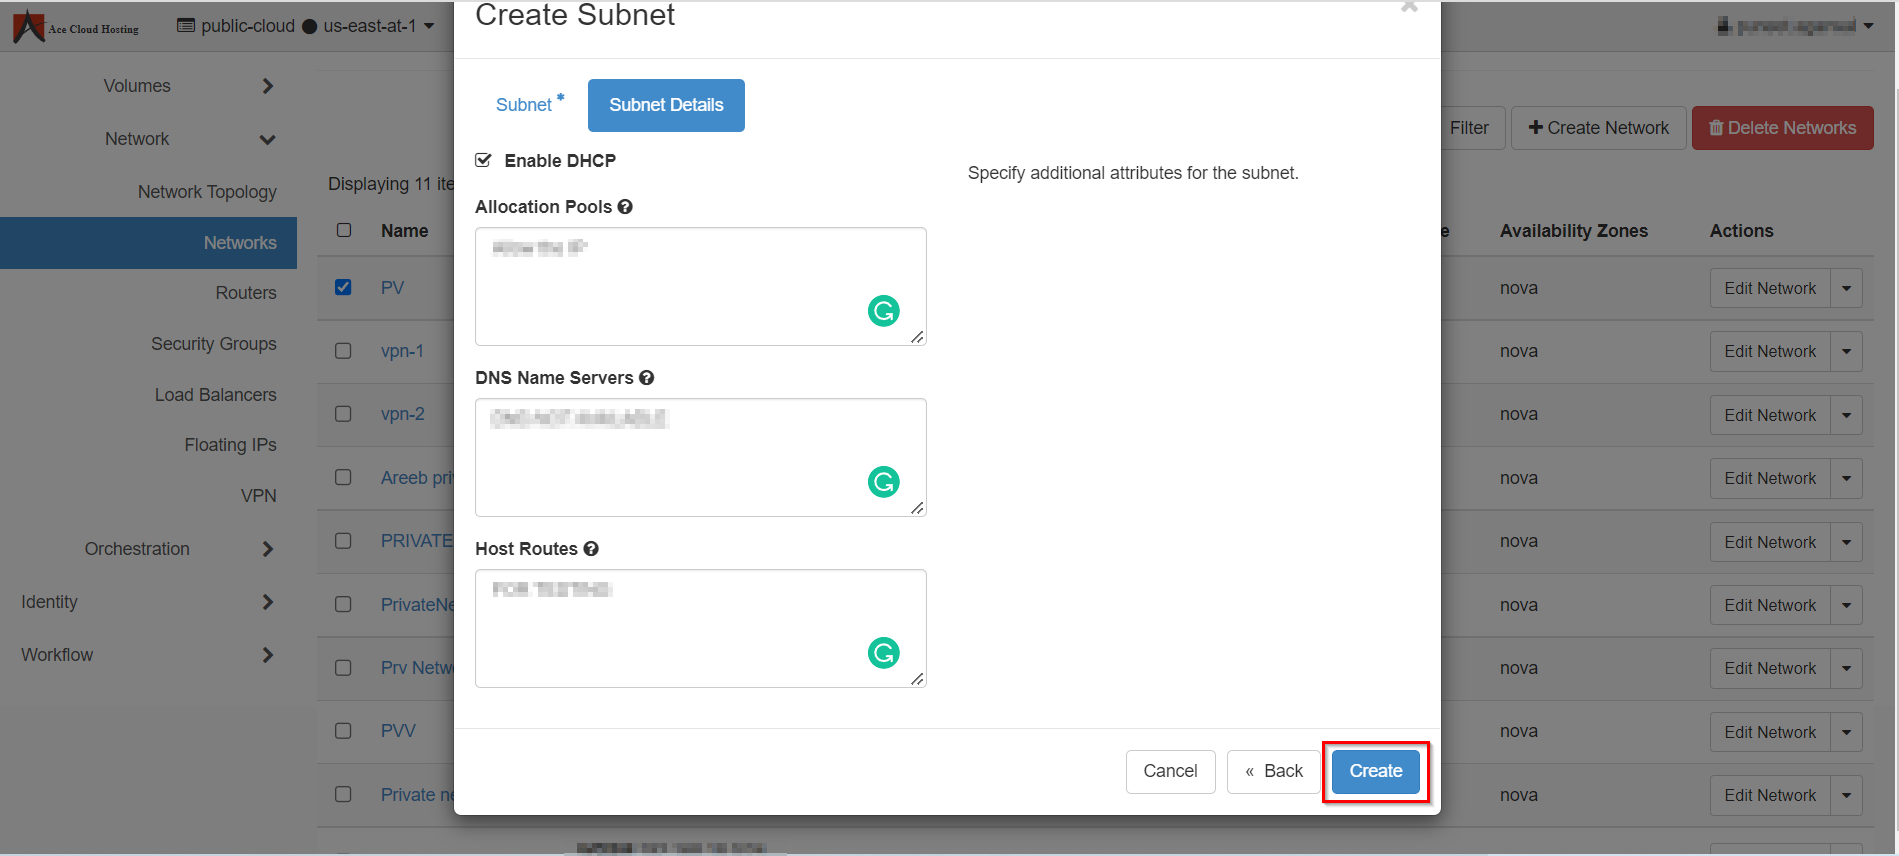
**Step 6**: Fill in the additional details and click on **Create**.
***Note:** You will get a message "**Success**: Subnet created Test\_1."*
 **Step 3**: Choose your network and click on the **drop-down**.
 **Step 4**: Click on **Create Subnet**.
 **Step 5**: Fill in all the details and click on **Next**.
 **Step 6**: Fill in the additional details and click on **Create**.
 ***Note:** You will get a message "**Success**: Subnet created Test\_1."*